Another month, another file system.
Well, if you can’t fix it in software, fix it in hardware (looking at you, bme680, we’re not done yet). The show must go on, as they say, and I would like my experiments to go on.
So a “new” addition to the environmental sensor family connected to the humble “server”: sgp30.
I say “new” because it was new when it was ordered, but it has since been discontinued. Work with what you have! At least you can still get them, and the new one is not that different.
Now things are getting interesting:
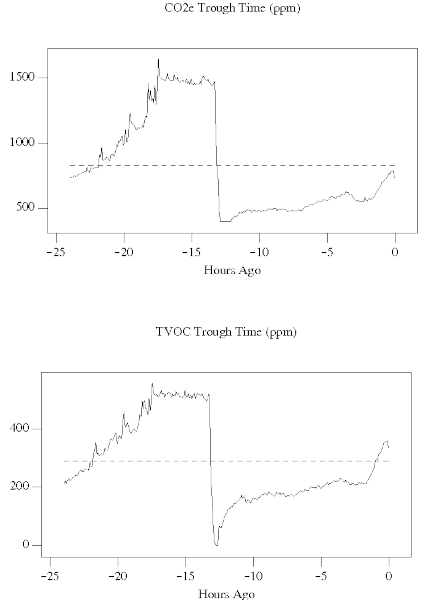
The days are getting shorter, and the nights are getting colder. Winter is coming! Which means groggy and slow mornings. And looking at the quantified air quality data for the first time, it might not be the anecdotal lack of early sunshine or low temperatures.
Additional data is required.
There’s no shame in that. Yes, there is documentation, code to be read, and debuggers to be used. But sometimes you just need to “see” what is happening.
So what warrants this reaction? Well, my project of shoehorning command history into plan9 still has some issues. One of them is not always working over drawterm, which is kind of annoying when working on remote systems. Especially with repetitive tasks like working on a sensor, where the development cycle is compile, run, analyze and repeat. Small commands that are not long enough as to feel like mousing around with a mouse is usefull. And not short enough to just type them in passing.
So let’s sniff what’s actually appearing on the application side. Code proudly referenced from riow program in 9front.
Some context: as understood from a quick glance at the riow code (true, I should research this more, when it’s time), keyboard input is presented as a “train” of characters or runes with a tag at the beginning. Either there is a control (ALT or SHIFT or CTRL or MODE or …) key being pressed (‘K’ character) or released (‘k’ character) OR a regular character is being sent (‘c’ character).
The referenced code looks for a control character to figure out if a modifier key is being pressed, followed by a regular character. In my case (CTRL + UP/DOWN) something is not behaving as expected.
Let’s do some tests and compare the results!
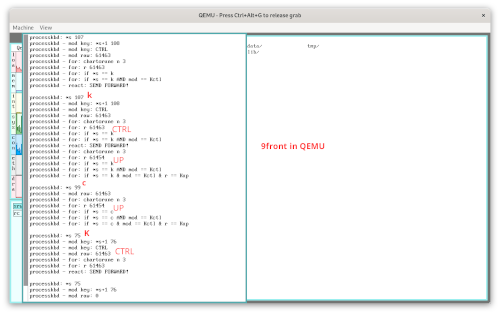
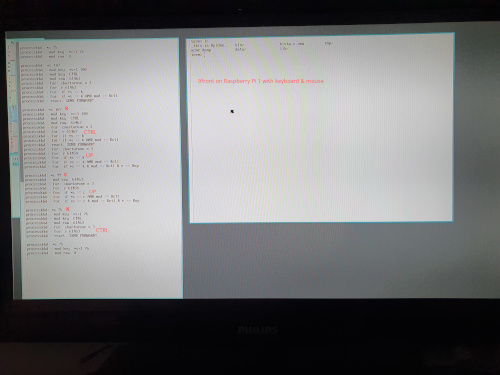
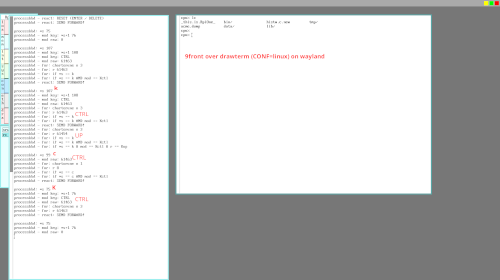
Tests are done by typing command lc followed by ENTER, then pressing the CTRL key and then the UP key.
9front in QEMU - regular character denotes UP:
9front on Raspberry Pi 1 with keyboard & mouse - regular character denotes UP:
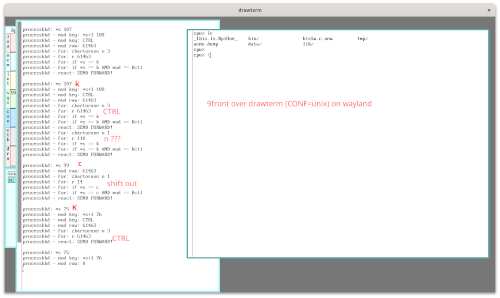
9front over drawterm (CONF=linux) on wayland - regular character denotes CTRL:
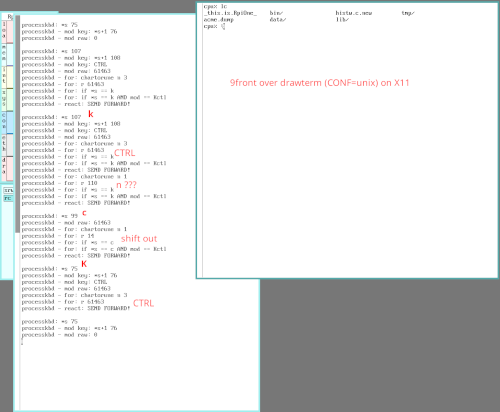
9front over drawterm (CONF=unix) on wayland - regular character denotes Shift Out:
9front over drawterm (CONF=linux) on x11 - regular character denotes Shift Out:
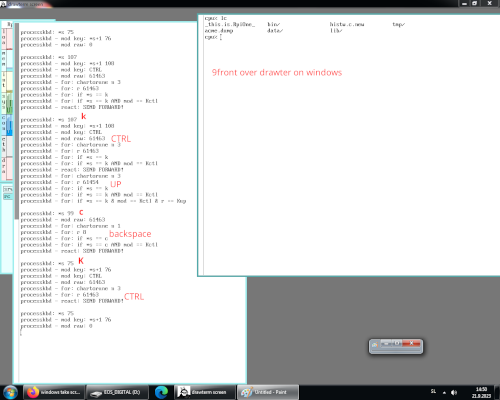
9front over drawterm on windows - regular character denotes Backspace:
Now this is certanly a wide collection fo results. Whan can we deduce from this?
Bare metal and QEMU are identical, so let’s assume this is how it is read from the physical input device.
- OK as it is.
Windows and Linux on Wayland have the right keys in control (k) block, but not in regular character (c).
- Fixed now in current version of histw by checking only (k) for key combinations.
Unix on X11 or wayland if a wild mix.
- Can’t fix in histw.
Conclusion of this test?
All signs point to how drawterm interprets or sends input information forward. This might be a future mini project to look into that. Might! One step at a time.
For now, let’s take the small win and use the latest and greatest (drawterm on Windows or Linux compiled for wayland) and live with the fix in histw for now.
Before we dive deeper into this rabbit hole, let’s figure out why printing out long commands on the input line stopped working.
Is anyone else familiar with the feeling when something fun becomes work?
Like when your favorite game gets an update with loot boxes (apologies; surprise mechanics) and grind. Or a quick task that will knock an item off a list and give you some motivation and momentum that turns into a rabbit hole of chores (Malcolm in the Middle was a GREAT show).
So has turned this fun adventure with the bme680 environmental sensor into a bottomless pit of miniature “ok, to make that work, I first need to completely reverse engineer this thing” soul-sucking jobs. Don’t misunderstand me; I love a challenge! But this whole thing was started to learn new things, not to become an expert in the field on this one thing. I have done enough academic research in my time to know how to pick these kinds of battle wisely.
I have countless ideas (that can be revisited later). From decompiling the library (not the first time) and reverse engineering the algorithm to simulating all possible variations of temp/press/hum/gas parameters and creating an ML model to learn its secrets (also not the first time).
But right now, I need a break from the “break” and to do some new fun things.
For example, how is it like updating the 9front install? While in the “sensor hole”, there was apparently a new release of 9front. The answer: suprisingly easy! Well, it’s easy compared to projects like LFS or archlinux.
Yes, you have to compile it yourself and copy the kernel manually, but the update process is really smooth. And it came with quite a few improvements.
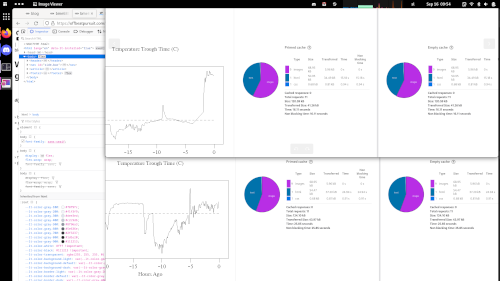
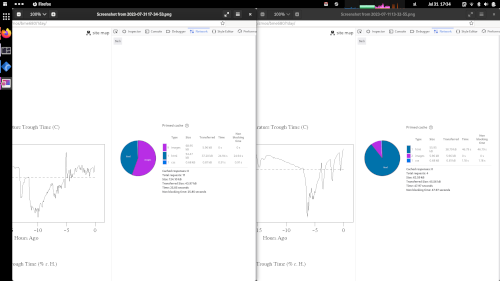
The system doesn’t just feel faster; it actually is faster:
Let’s throw in some CSS tweaks as well, and the site is fun to work on again.
While we’re updating everything, how about some hardware updates?
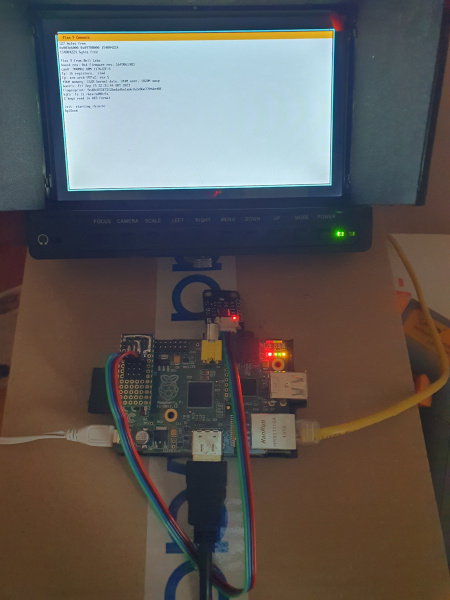
Let’s add a homemade I2C bus break board for the Raspberry Pi with the worst soldering ever:
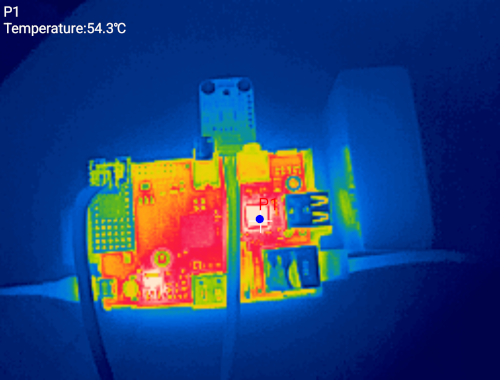
Since I discovered that pictures add a certain flair to these posts, a thermal check how the previous Raspberry Pi overclocking is holding up:
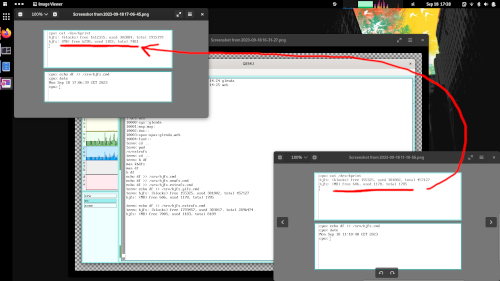
And to continue the update streak, why not finally figure out how to resize the hjfs partition.
It actually worked:
All of this got me interested in what else in the plan9 / 9front world got updated. If nothing else, I see the new drawterm now has a window bar under Wayland. It’s amazing that this part of the computing world is still kicking so much. Brings back some motivation for my own projects.
And we’re back on track.
More precisely, it is okay to do boring, soul-crushing things.
We all want to do “fancy” and exciting things, most, if not all the time. This very blog is an exercise in posting something neat.
But most of the time, you have to play an adult and do the nitty-gritty things to actually finish something.
Now, this bme680 sensor is becoming a pet peeve of mine.
Thinking that the heating element was burned, not much attention was paid to the actual gas resistance values denoting air quality. Not that there is any reference to good/bad values outside of using the BSEC library to print out an AQI value. And now with a set of working sensors, the results did not get better or comparable with the output from the Arduino install.
To be fair, upon a review, a few of my own bugs were discovered (like, never actually writing proper heating timings to the sensor). Don’t code during heatwaves without an AC; it’s not good for your code.
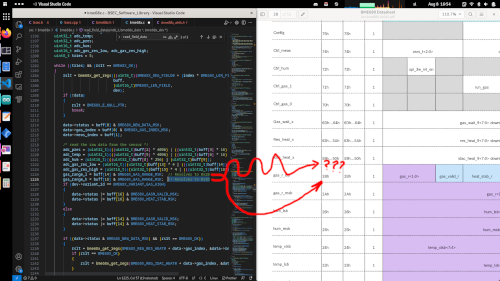
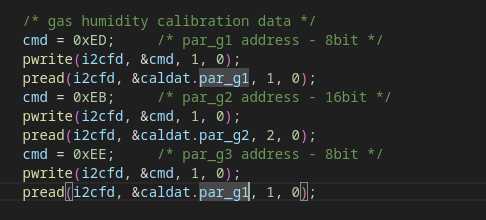
Nevertheless, something is “missing” from the documentation:
Now this example actually turned out to be a red herring, since all sensors are identified from the documented registers, and you can’t blame the manufacturer for this too much. It might have something to do with internal testing/QA or a set-up for a different sensor in the family. Who knows?
But then there is this doodoo duckery:
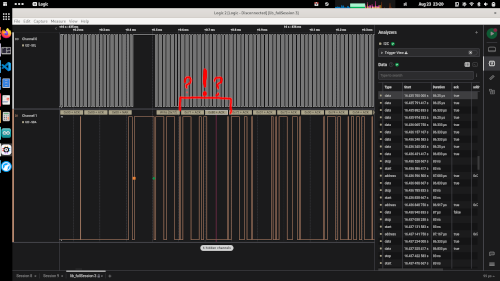
This is why we have trust issues. When using the BSEC Arduino library with the binary blobs that can calculate the AIQ from gas resistance, if you check the communication on the bus with a logic analyzer, you can see the library writing values to bits that are marked DO NOT CHANGE in the documentation.
A theory is being developed here: this sensor is great and easy to use for temperature, pressure, and humidity. Start sampling, read the data, convert to preferred units, and that’s it. For air quality, this was never intended to be used without the provided blobs.
Now that we are observing the sensor with the BSEC library, there are some quirks being discovered. From “burn in time” for gas sensor (before giving reliable measurements) not being time since the sensor was powered on but time constantly sampling at least every 3 seconds. To the documentation/library performing “do as I say, not as I do” and changing DO NOT CHANGE BITS.
Now this mistery is far from over. But the process of solving it is tedious. Boring. Filled with wishes for doing something more exciting. And yet, you have to do what you have to do. And that’s okay.
Well, it’s more of a reminder than a lesson.
It is more important what you optimize than how much you optimize.
It turns out, that for all the overclocking and tweaking of the abused first generation Raspberry Pi, the best performance increase you can get:
Is to not read everything all of the time from the SD card:
I have come to a realization: coding for Arduino is like coding with ChatGPT.
Both are very useful tools. Spectacular if you’re learning, experimenting, or quickly prototyping with stuff. In other words, it is best when used to do something that has been done to death before. Venture out of this realm and you better be worth “your salt” (electrolytes are important for proper brain function).
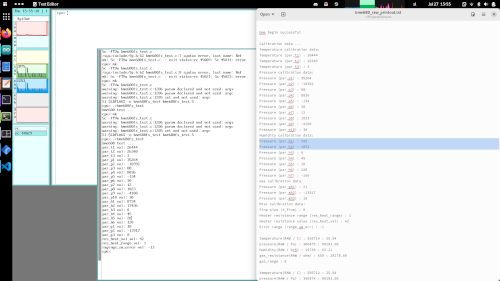
Now, I’m not beyond ducking up royally:
Let’s file this one under “Rust wouldn’t fix this (TM)”.
So it’s good to validate your code/design/results/… against something known. And having finally gotten new bme680 sensors, it was time to do just that. And what a quicker and easier way than to slap it on an Arduino and compare results.
Yeah, it’s never that easy. The original Bosch library doesn’t work on the Arduino at hand (using precompiled blobs), and the DFRobot library from the manufacturer has nothing exposed.
Well fork, let’s do it ourselves and expose the raw data from the sensor.
And no, even that was not enough to figure out that one last discrepancy.
Let’s file this one under “Trust nothing (TM)”.
