Another month, another file system.
Well, if you can’t fix it in software, fix it in hardware (looking at you, bme680, we’re not done yet). The show must go on, as they say, and I would like my experiments to go on.
So a “new” addition to the environmental sensor family connected to the humble “server”: sgp30.
I say “new” because it was new when it was ordered, but it has since been discontinued. Work with what you have! At least you can still get them, and the new one is not that different.
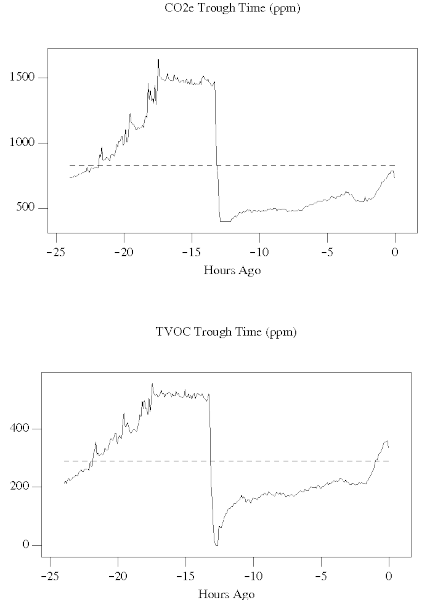
Now things are getting interesting:
The days are getting shorter, and the nights are getting colder. Winter is coming! Which means groggy and slow mornings. And looking at the quantified air quality data for the first time, it might not be the anecdotal lack of early sunshine or low temperatures.
Additional data is required.
More precisely, it is okay to do boring, soul-crushing things.
We all want to do “fancy” and exciting things, most, if not all the time. This very blog is an exercise in posting something neat.
But most of the time, you have to play an adult and do the nitty-gritty things to actually finish something.
Now, this bme680 sensor is becoming a pet peeve of mine.
Thinking that the heating element was burned, not much attention was paid to the actual gas resistance values denoting air quality. Not that there is any reference to good/bad values outside of using the BSEC library to print out an AQI value. And now with a set of working sensors, the results did not get better or comparable with the output from the Arduino install.
To be fair, upon a review, a few of my own bugs were discovered (like, never actually writing proper heating timings to the sensor). Don’t code during heatwaves without an AC; it’s not good for your code.
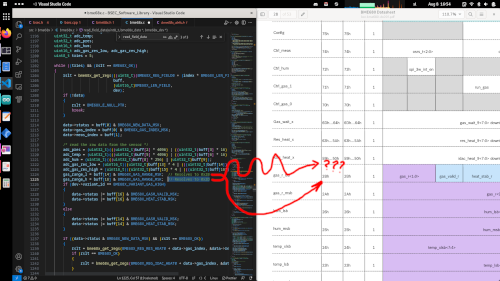
Nevertheless, something is “missing” from the documentation:
Now this example actually turned out to be a red herring, since all sensors are identified from the documented registers, and you can’t blame the manufacturer for this too much. It might have something to do with internal testing/QA or a set-up for a different sensor in the family. Who knows?
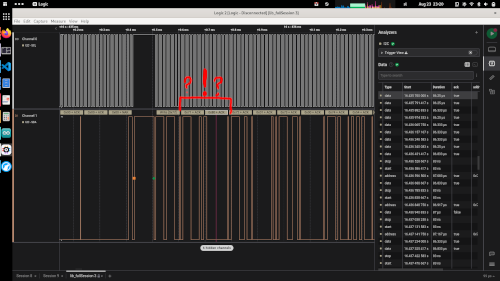
But then there is this doodoo duckery:
This is why we have trust issues. When using the BSEC Arduino library with the binary blobs that can calculate the AIQ from gas resistance, if you check the communication on the bus with a logic analyzer, you can see the library writing values to bits that are marked DO NOT CHANGE in the documentation.
A theory is being developed here: this sensor is great and easy to use for temperature, pressure, and humidity. Start sampling, read the data, convert to preferred units, and that’s it. For air quality, this was never intended to be used without the provided blobs.
Now that we are observing the sensor with the BSEC library, there are some quirks being discovered. From “burn in time” for gas sensor (before giving reliable measurements) not being time since the sensor was powered on but time constantly sampling at least every 3 seconds. To the documentation/library performing “do as I say, not as I do” and changing DO NOT CHANGE BITS.
Now this mistery is far from over. But the process of solving it is tedious. Boring. Filled with wishes for doing something more exciting. And yet, you have to do what you have to do. And that’s okay.
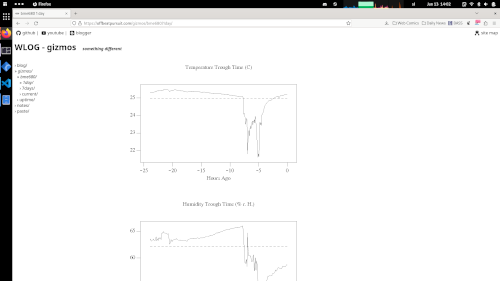
It’s all coming together now.
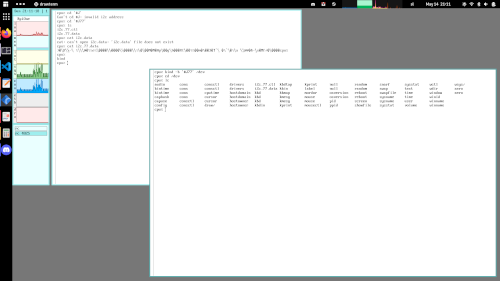
Now, this “screenshot” took some “duct tape” and “grease” to put together. It can be summed up in three categories.
Setting up cron to periodically collet data from a sensor. This (plan9) being a distributed system, has its quirks. One of them was to run cron on a standalone system, since cron is meant to be run on an auth server and log into a designated machine and remotely execute a command there. So, a hacky script was developed to run cron only once from the system owner’s profile file.
Processing and plotting collected data. All glory to the power of the “old school” publishing tools (grap | pic | troff | gs), but it got done in the end. Once an image of a plot was coaxed from the pipeline, it still needed base64 utility, which the internet provided.
And wrapping everything up in a werc app to serve it on a page.
Well, there is an rc script doing the publishing tool chain on the collected data inside the werc app. But the point is, it works!
Another month, another file system.
Something a bit more interesting this time. An environmental sensors, to be connected to the humble “server”: bme680.
Though, it needs to be said, this one brought back memories of disdain of dealing with datasheets. Now, nothing wrong with them, in fact, they are extremely useful. But you can’t help to wonder what the intern was like, who obviously landed the “challenge” of preparing the documentation. We’ve all been there, right? (No? Just me?). But you know it’s true, when you have to go scrounge through their official Arduino library to figure out the type of the data read from the built-in registers.
Oh, and I burned the sensor too. How nice, that the datasheet notices that the provided API runs the sensors at 1Hz at max in continuous mode for testing. Not that this is the maximum you should stress the heating element at. Guess who opened the “file” with the data multiple times a second.
And the application note is even more hilarious. For the sensor self test, just make the measurements and if the calculated temperature is between 0°C and 60°C the sensor probably works. Not, by any chance because that would be useful, what are the possible raw bits from the sensor before the conversions, calibrations correction and calculations, to narrow down where the problem resides.
This one was fun! To be continued when the new sensor arrives.
Deeper and deeper in to the “source” we go.
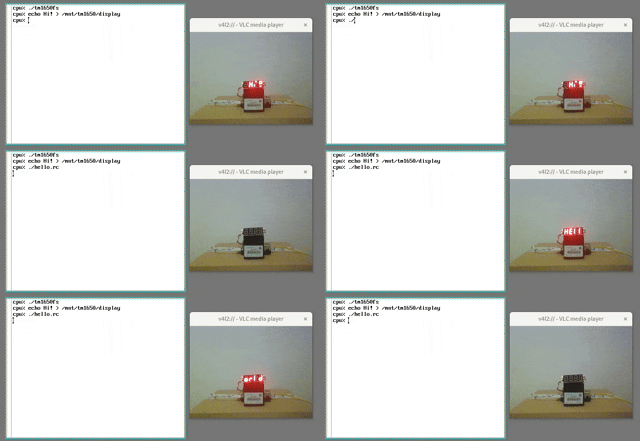
A quick dip in to the “filesystem way” of things on Plan9, by writing our own Plan9 protocol (p9) file system for a TM1650 7-segment display driver: tm1650fs.
Every long data transfer starts with a single bit.
There is a goal to all this randomness. To “work out my embedded development muscle”.
So, before we start straight up porting plan9 to other devices, let’s try and poke around a working system first and see what is where.
And sorting out and using I2C on a Raspberry Pi 1 seamed like a good start. A lot has been done here already, so it’s a soft start.
Sorting through it and writing it down for anyone interested: notes/plan9/i2c.
With a first success in compiling a custom kernel and poking around a bme680 sensor.
